My Obsidian Daily Note Template 2022
This article is about how I use the Daily Notes feature in Obsidian to manage my day.
I’m a designer, creator, and productivity nerd so having an easy-to-use and engaging system helps me to get my work done.
I make use of several plugins and code snippets to make this system possible so I wanted to share how it all works.
If want to learn more about Daily Notes, Templater, Dataview, Buttons, Typescript, and more in Obsidian, you’ve come to the right place.
Huge credit to the following people who I took a lot of inspiration from for this system: @evielync for the rough structure of the daily note, Jonas Schumacher whose article helped me to retrieve random notes, and as always The Obsidian Forum for pretty much everything else Obsidian related.
Daily Note Overview
Let’s take an overview of the daily note in action so you can see how I use it.
After that, we’ll focus on how I set this up including all the fun code snippets and the plugins used.
Today’s Date

The current day and date are populated at the top of the note. You’d be surprised how often I forget what day it is so this is useful to have in my eye line 😅.
This is generated by a Templater code snippet which we’ll cover in the Daily Note Setup Process section.
📅 Daily Log

The Daily Log section is where I write any notes, thoughts, ideas I have throughout the day.
It helps me to keep things in one place so I can refer to it at the end of the day before I shut off from work.
I’ve started including the timestamp beside each entry to more accurately log my day so I’ll see how that experiment works over the next few weeks.
🟠 Goals + Projects
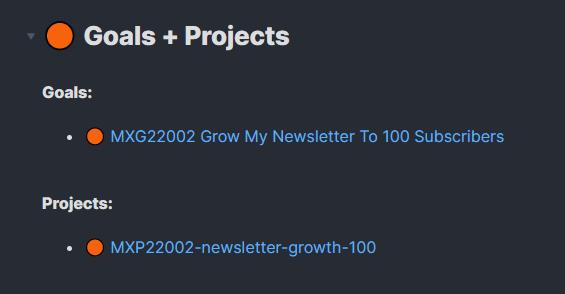
The Goals + Projects section allows me to keep on track with my in progress goals and projects (as you might expect).
I find it tough to stay on top of my current set of goals and projects at any one time so seeing them listed here makes them more accessible. This also makes me more inclined to do some work on them each day.
These lists are populated with the Dataview plugin.
🚀 Things I’m Creating
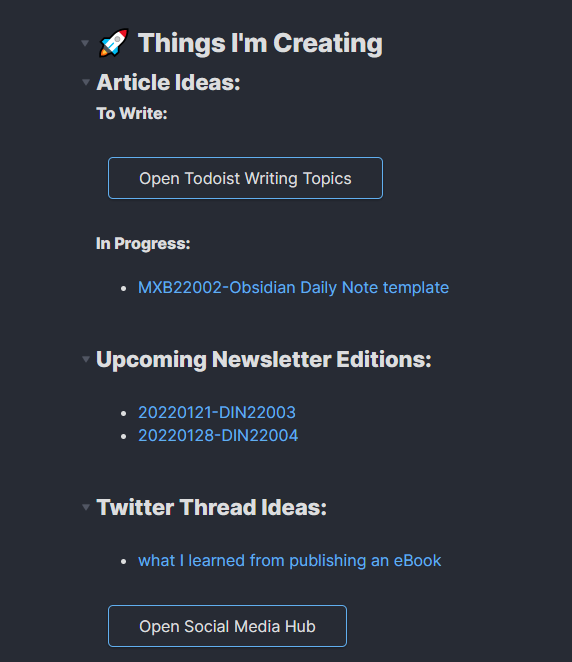
The Things I’m Creating section is where I manage my content creation. This includes articles for my blog, upcoming editions of Design Insight (my newsletter), and Twitter thread ideas.
Article Ideas
The “Open Todoist Writing Topics” button, when clicked, will take me to the Writing Topics project I have in Todoist. This is where I manage article ideas as I can do it from my phone wherever I am.
Having this link here makes the list much more enticing to look at, so you can see why I included it!
This button is created with the Buttons plugin and styled with some custom CSS.
Underneath that button is a list of articles that are currently In Progress. This allows me to easily continue where I left off last time I was writing which is a great way to get back into the flow.
This list is generated using the Dataview plugin.
Upcoming Newsletter Editions
This is a list of upcoming editions of my newsletter: Design Insight.
I usually try to prepare the newsletter at least 2-3 weeks in advance even if I don’t fully complete things. It’s helpful to see the list of upcoming editions so I can spend some time each day adding the necessary content.
This list is generated using the Dataview plugin.
Twitter Thread Ideas
This is a list of Twitter thread ideas I would like to create.
As Ideas come to me for great threads to write I add them to my daily log. I then process them into the Twitter Thread Ideas bucket at the end of the day so they’re all nice and organized.
Again, by having the list right in front of me, there’s less friction to getting started so I’m more likely to start writing.
This list is generated using the Dataview plugin.
Underneath the list is a button that opens a note in Obsidian. This note contains useful info for my social media content creation strategies like useful links and resources.
If you’d be interested to get this useful info. as a swipe file just let me know over on Twitter 😄
This button is created with the Buttons plugin and styled with some custom CSS.
👩💻 Things I’m Consuming
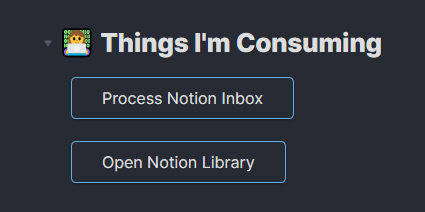
Process Notion Inbox - this button opens up Notion to my Inbox page.
This reminds me to process my inbox each day which keeps things organized.
Here’s why I love the inbox system so much: Using Inboxes To Manage Your Thoughts And Ideas
This button is created with the Buttons plugin and styled with some custom CSS.
Open Notion Library - this button opens up Notion to my Library page. Notion is where the first iteration of my content consumption happens.
I wrote more about that process here: Notion Library Tour - How I Capture Knowledge On What I Watch & Read
This button is created with the Buttons plugin and styled with some custom CSS.
💬 Thoughts + Ideas
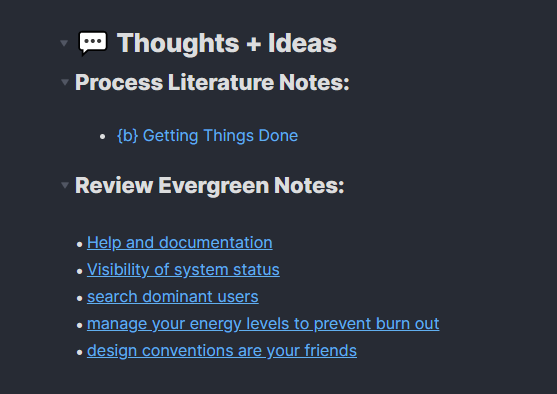
Process Literature Notes
This section contains a list of in progress literature notes. It helps me to keep on top of my content consumption and ensures I get the most value out of my notes.
All my literature notes eventually end up in My Knowledge Vault Of Digital Notes which is available to buy so it’s important to me that I’m always topping it up with more valuable entries.
This list is generated using the Dataview plugin.
Review Evergreen Notes
This is the part of the template I’m most proud of. It’s a randomly generated list of 5 evergreen notes.
This section allows me to actually take time and revisit older notes I’ve taken. By doing this, my notes are always resurfaced at random times so I can add to them as new thoughts and ideas come to mind.
This is achieved using the Templater plugin and a nifty script I adapted to suit my needs.
Daily Note Setup Process
OK so now we’ve covered the ‘front-end’ or end result of the Daily Notes template it’s time to dive into the code or implementation side of things.
Something important to note is the Dataview code snippets in particular are catered towards my personal Obsidian vault setup.
If you’d like to see more about how it all works in detail here’s the article you should read: A Walkthrough Of My Obsidian Setup.
Hold onto your hats, this will be fun!
Write out what you want in a daily note
Before I started writing a single bit of code, I gathered inspiration and wrote down what I wanted to include in my daily note.
I know this sounds boring but taking the time to plan things in advance made the build process a lot easier.
I took a lot of inspiration from this video by Ev Chapman who I credited at the start of this article:
Install and enable the plugins
Here are the plugins I used for this system:
- Buttons - To create the aesthetically pleasing buttons that are super clickable. No additional configuration is needed after install (make sure it’s enabled).
- Daily Notes - This is an Obsidian core plugin so you don’t need to download it from the community plugins section.
- Enable from Settings > Core Plugins
- Date Format: “YYYYMMDD”
- New file location: “99-daily-notes/” - this is where all the daily notes go
- Template file location: “99-templates/📄 Daily Note Template” - this is the daily note template you will create below. Make sure the name is correct.
- Dataview - For running database-like queries to retrieve lists of data. I believe I use all the default options with this plugin but I change all date type fields to this format: “yyyymmdd”.
- Templater - For creating template code + scripts to auto-populate in the daily notes. Set the Template Folder Location.
- Template folder location: “99-templates”
- Trigger Templater on file creation = true
Create a new daily note template
With all the plugins set up and ready to go, it’s time to create a new note in your template directory.
This is the template that’s added to each daily note so be sure to include this in the Daily Notes settings under “Template file location”. Double-check spelling etc.
Templater Code Snippet For Today’s Date
This code snippet produces the current date in the format: “Wednesday 12th Jan 2022”:

# <% tp.date.now("dddd Do MMM YYYY", 0, tp.file.title, "YYYY-MM-DD") %>
Dataview Code Snippets
Goals + Projects
Goals:
This is the Dataview code used to retrieve files in the “01-life-os/03-goals” directory that have the label #inprogress:

list
from "01-life-os/03-goals" and #inprogress
sort file.name asc
Projects:
This is the Dataview code used to retrieve files in the “01-life-os/04-projects” directory that have the label #inprogress:

list
from "01-life-os/04-projects" and #inprogress
sort file.name asc
In Progress Articles
This is the Dataview code used to retrieve files in the “05-Creation/01-articles” directory that have the label #inprogress. I’ve limited the results to 5 though it’s not really necessary:

list
from "05-Creation/01-articles" and #inprogress
sort file.name asc
Limit 5
Upcoming Newsletter Editions
This is the Dataview code used to retrieve files in the “05-Creation/03-newsletter” directory that have the label #inprogress. I’ve limited the results to 5 though it’s not really necessary:

list
from "05-Creation/03-newsletter" and #inprogress
sort file.name asc
Limit 5
Twitter Thread Ideas
This is the Dataview code used to retrieve files in the “05-Creation/02-social-media/thread-ideas” directory that have the label # towrite. I’ve limited the results to 5 so I don’t get overwhelmed with ideas:

list
from "05-Creation/02-social-media/thread-ideas" and #towrite
sort file.name asc
Limit 5
Process Literature Notes
This is the Dataview code used to retrieve files in the “02-literature” directory that have the label # inprogress. I’ve limited the results to 5 so I don’t get overwhelmed with results:

list
from "02-literature" and #inprogress
sort file.name asc
Limit 5
Generate A List Of Random Evergreen Notes Using Templater
Include this line of code in the Daily Note Template:

<% tp.file.include("[[Random Evergreen Note Template]]") %>
This will include the contents of the note “Random Evergreen Note Template”.
Be sure the file name inside the double braces is correct as this stumped me for a good 20 minutes initially 🤦.
Now create a separate template file called “Random Evergreen Note Template” - this name should match the name in the code snippet above!
Here’s the code to include in that template file (Typescript):
<%*
    const randomEvergreenNotes = []

    app.metadataCache.getCachedFiles().forEach(filename => { // get all filenames in the vault and iterate through all of them, calling a function for each of them
	let { tags } = app.metadataCache.getCache(filename) // get the tags in the  file w/ the given name
    tags = (tags || []).filter(t => t.tag && "#evergreen" === t.tag) // filter out all tags that are not "#evergreen"

    if (tags.length > 0) {
	  randomEvergreenNotes.push(filename.slice(13, filename.length - 3)) // removes first 13 characters (03-evergreen/) then cuts off last three characters from filename (.md)
        }
    })

	// loop through and display 5 random notes
    var i = 0
    do {
        const randomIndex = Math.floor(Math.random() * randomEvergreenNotes.length)
        tR += `- [[${randomEvergreenNotes[randomIndex]}]]` + "\r\n"
        i++
    } while (i<5)
%>
If all is working as expected, generating a new daily note should run this script and result in 5 random Evergreen notes 😃.
If it didn’t work you can check the console:
- Type Ctrl + Shift + i (Or Cmd + Shift + i on Mac I believe) to open the developer console.
- Then select the Console tab and look for any errors
Adding Buttons
Once the Buttons plugin is installed and enabled all you need to do is add the code snippet to generate some nice buttons.
Here’s how to create a button that opens the Todoist app:

name Open Todoist Writing Topics
type link
class obsidian-button
action todoist://project?id=2253952003
Here’s how to create a button that opens an Obsidian note:
name Open Social Media Hub
type link
class obsidian-button
action obsidian://open?vault=Knowledge%20Vault&file=05-Creation%2F02-social-media%2F03-social-media-posts
Here’s how to create a button that opens a web page (in my case Notion):
name Process Notion Inbox
type link
class obsidian-button
action https://www.notion.so/
Adding a custom class to the button
As you can see from the button code I have a class called “obsidian-button”.
To access the CSS file for this I went to Settings > Appearance the under CSS Snippets I selected the Open Snippets Folder icon.
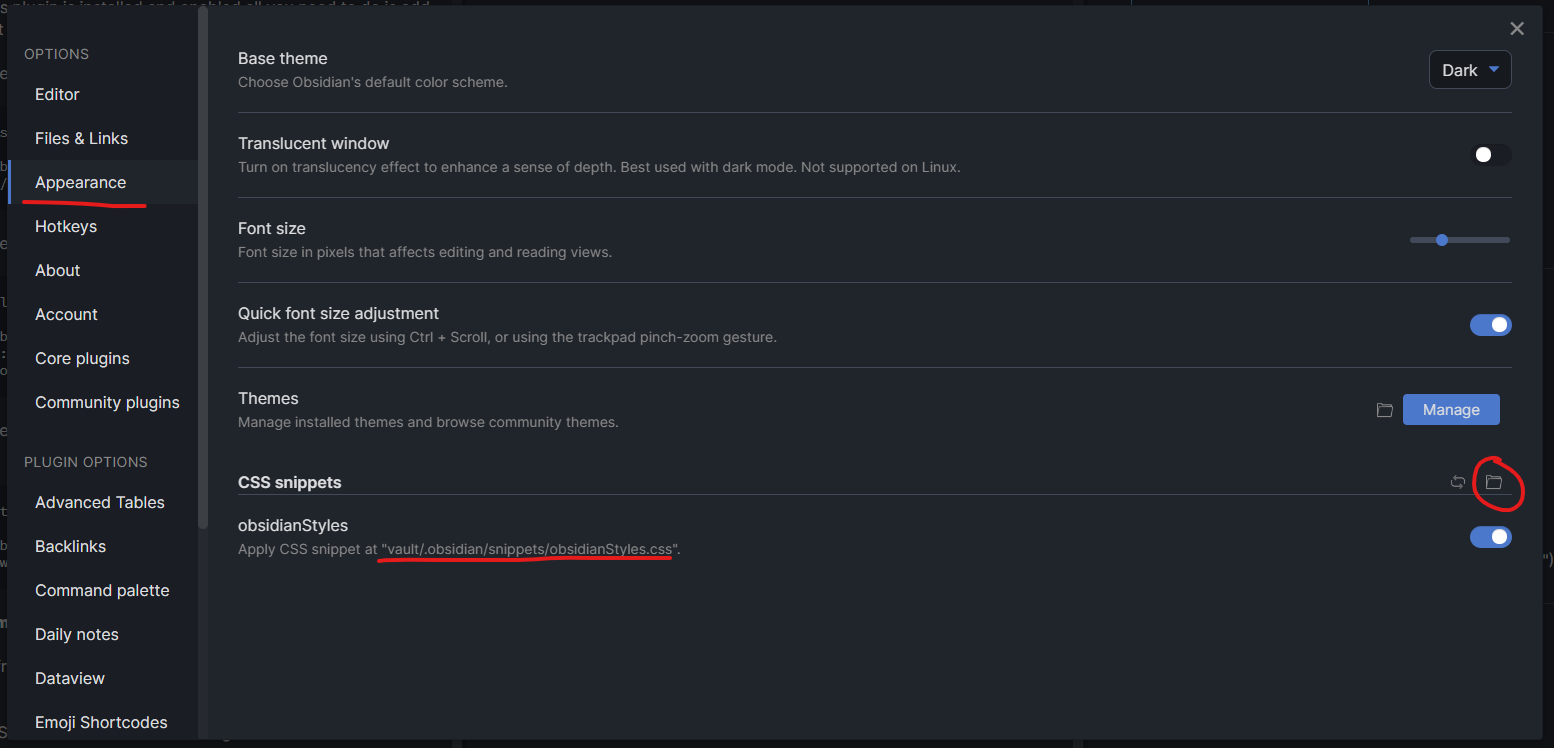
This brought me to the file the snippets directory is found in so I opened that CSS file and added the button styling:
.obsidian-button {
  border: 0.5px solid var(--button-border, #61afef);
  border-radius: var(--button-border-radius, 5px);
  background-color: var(--button-background);
  padding: 10px 30px;
  color: var(--button-text);
  text-decoration: none;
  font-size: var(--button-size);
  margin: 0 5px;
  box-shadow: 0 1px 3px var(--button-box-shadow, rgba(0, 0, 0, 0.12)),
    0 1px 2px var(--button-box-shadow, rgba(0, 0, 0, 0.24));
  transition: all 0.3s cubic-bezier(0.25, 0.8, 0.25, 1);
}

.obsidian-button:hover {
  box-shadow: 0 4px 4px var(--button-box-shadow, rgba(0, 0, 0, 0.25)),
    0 10px 10px var(--button-box-shadow, rgba(0, 0, 0, 0.22));
  background-color: var(--button-background);
}
You can read more about adding CSS in Obsidian here: Customizing CSS
My Key Take-Aways
- Knowing how to search for something is an invaluable skill to have. I was able to navigate the Obsidian forums to find what I was looking for. With that info. I could then implement the solution in my own way to produce my own results.
- Try lots of plugins and see what works for you. I went through between 10 and 20 plugins throughout the course of this process to end up with the ones I currently use. I would never have thought to use Templater for instance without actually trying it out for myself.
- Instead of directly copying a workflow or implementation, think about what would work for you, then implement that approach. This will give you a custom system tailored to you which you’ll be more likely to continue using.
- Things won’t be perfect right off the bat. I’m prepared for this system to evolve as I continue to use it which is really exciting to think about. As I explore new techniques and stop following older ones this Daily Note process will continue to change.
I hope you found this article useful and you learned something from it. If you did, please consider sharing it on Twitter so others can find it 😊
If you want to read more about Obsidian and Knowledge Management in general, there are some related articles below 👇